Posts Tagged baggage bulkheads
Miscellaneous Tasks Again (1/19/13)
Posted by Ethan Jacoby in Aft Fuselage, Center Fuselage, Construction, Fuselage on January 19, 2013
3.0 Hours –
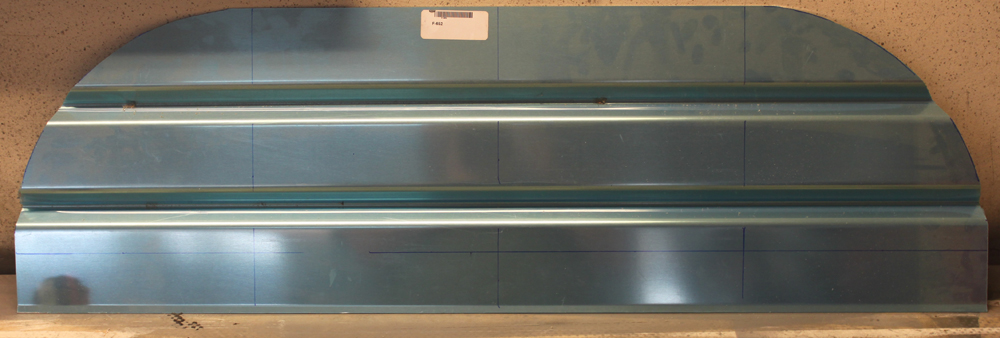
I worked on a few more miscellaneous things today. First, I finished prepping the lower baggage bulkhead, including primer and paint.
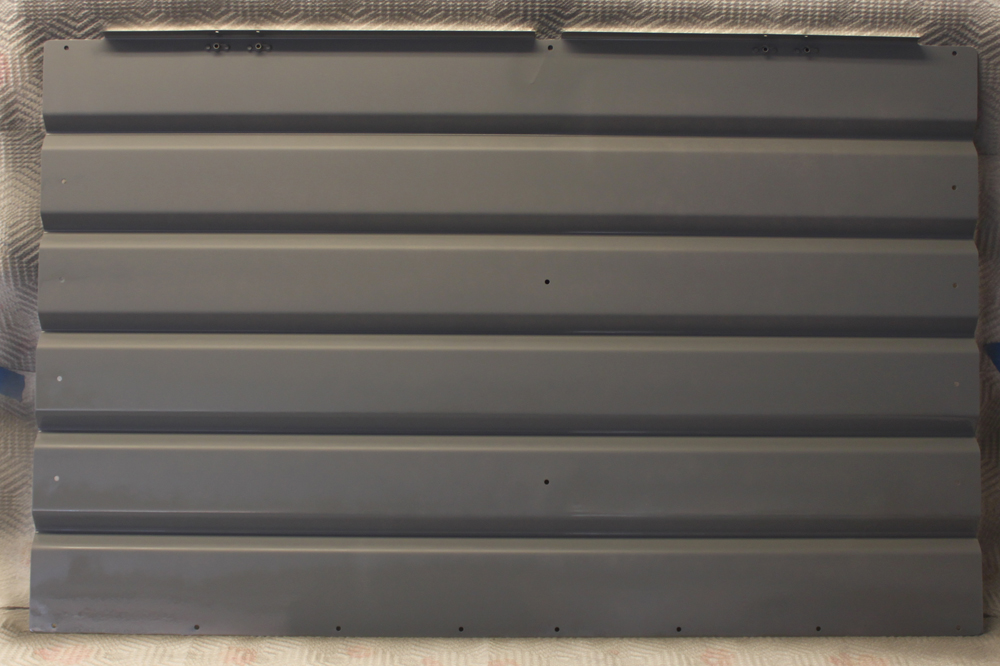
The lower baggage bulkhead primed and ready for paint.
Next, I installed some tubing that connects the two static ports together. There’s no real need to install this now, other than to close the system, preventing debris from getting into the ports. I placed a tee connection on the left side. Eventually, a tube will run from the tee to wherever my ADAHRS (air data and compass module) are located. However, for now, I just attached a short length of tubing and closed off the end with some duct tape to make sure nothing could get in.
I installed the tubing that connects the static ports together. I did this now mainly to keep dirt, and other stuff, out of the system.
After taking a short break, I returned to the plane and prepped and painted the aft baggage covers. At this point, I think I want to paint anything going into the plane before it gets riveted. Along that line, I also decided to start getting the inside of the fuselage ready for paint. My plan is to paint everything from the F-706 bulkhead forward to where the sub-panel will be. That should cover everything that is visible. The floor forward of the F-704 won’t get painted though, as that will be covered with carpet. Similarly, I won’t paint anything that will later be covered by a floor board or access panel. Less paint equals less weight!
Conduit Runs and Lower Baggage Bulkhead Prep (1/18/13)
Posted by Ethan Jacoby in Center Fuselage, Construction, Fuselage on January 18, 2013
1.8 Hours –
My baggage and aft seat floors are going to be installed per plans. In other words, they won’t be removable. Because of this, I wanted to install some wiring conduit just in case I needed extra room for wires to the back of the plane. I probably won’t even use these, but installing them now is easier than drilling out all the rivets in the floors so that I can run wires later. I decided to run two conduits, one on each side of the plane in the bay next to the outboard bay. Installation was simple. Drill 3/4″ holes in the bulkheads, pull the conduit through, and put a blob of blue RTV on the conduit/bulkhead to hold in place and reduce vibration.

Conduit, in the process of being installed, under the baggage and aft seat floors. The one on the right is finished, while the left has only had the openings drilled in the bulkheads.

The conduit is finished. I left them long on the forward end, but will trim it back once I decide on the best length.
Next, I turned my attention to the lower baggage bulkhead. This bulkhead needs to be deburred, primed and painted, just like the upper bulkhead. For tonight, I just got the deburring done.
Seat Belts and Static Ports (1/17/13)
Posted by Ethan Jacoby in Aft Fuselage, Center Fuselage, Construction, Fuselage on January 17, 2013
2.4 Hours –
I wanted to get several random tasks out-of-the-way today. The primary items on my list were the static ports and the lap belt anchor points. Neither of these really needed to be done now, but, why not?
I started by prepping the fuselage for installation of the static ports. Since I had already drilled the holes, all I had left to do was to scuff up the interior area surrounding the holes, and then clean the area well with some MEK. I repeated this process with the mating surfaces of the static ports.
With everything ready to go, I opened up one of my small sealant kits and mixed in the activator. I had forgotten how thick and sticky this stuff is. Fortunately, I remembered to wear a couple of layers of gloves so that I could easily remove the outer layer once they had some sealant on them. After mixing well, I put a thin layer of sealant on each static port (I placed the shank of a blind rivet in the opening of each port to make sure no sealant got into the hole), and then positioned them on the fuselage. To insure they stayed in position, I used a couple of big wood clamps.

I used some massive wood clamps to hold the static ports in position while the sealant set.

Another view of the static port installation.
I allowed the sealant to set for about an hour while I did other things, then I removed the clamps and used some MEK to clean up any sealant that got on the outside of the fuselage. Once cleaned-up, the ports were done. I’ll give them at least a day to cure before I try installing any of the plumbing, but they already seem pretty solid.

Once the sealant was semi-set, I removed the clamps and cleaned the excess sealant from around the ports.

A side view of the static ports. I think these look much nicer than the Van’s pop-rivet port.
While I was waiting for the static ports to cure a bit, I moved on to another random task of making “platenuts” for the tie-down ring storage system. It sounds fancy, but it’s not! I’ll drill two holes in the forward baggage covers, then attach my homemade platenuts to the inside of the covers. The platenuts are tapped to accept the tie-downs, and it will make for a nice storage place for the tie-down rings when I don’t need them in the wings.

I made two platenuts that will be attached to the forward baggage covers and used to store the tie-down rings when I don’t need them on the wings.
Next, I moved on to the lap belt attach points. The attach points on the Crow harnesses all have a diameter of about 1/2″. The attach points in the plane all use 1/4″ fasteners. There are a couple of options. I can either drill new holes in the harnesses, much like I did for the crotch strap, or I can press-in some washers that will act as a bushing. I opted to go with the washer method. Unfortunately, a standard washer was slightly to great in diameter to work as is, so I had to place a few washers on a long bolt, chuck the bolt in my drill press, and file down the washers. After a few minutes, I had a stack of washers that was close to the correct diameter. To get them into the harnesses, I used my pneumatic squeezer to press in a stack of three washers into each attach point. Once done, all of my attach points had nice 1/4″ openings.

The holes in the Crow harness attach points are 1/2″, but the attach points in the fuselage are 1/4″. I squeezed some washers into the hole on the attach point to act as bushings and bring the diameter down to 1/4″.
Since I had the harnesses out, I also took a few minutes to torque the lap belt attach brackets in the fuselage. I placed one of the harness attach points into each set of brackets to ensure that the spacing was correct. Then, I torqued the bolts holding the attach points to the fuselage and marked them with some inspection lacquer.
My last task of the evening was to install my “EXPERIMENTAL” placard on the baggage bulkhead. I decided to do this now since the baggage bulkhead’s paint was dry and the bulkhead itself was nice and clean (no dust). The decal went on easy, and I managed to get it straight and centered on the first attempt. I was pretty happy to see the upper baggage bulkhead painted and placarded. I may have to hang it on the wall somewhere instead of storing it the wing-cradle where it will be out of sight.

I included an “Experimental” decal in a recent order of random stuff from Aircraft Spruce. Since the baggage bulkhead paint was dry, I decided to go ahead and put the decal on. Very cool!
Baggage Bulkheads Continued (1/13/13)
Posted by Ethan Jacoby in Center Fuselage, Construction, Fuselage on January 13, 2013
2.7 Hours –
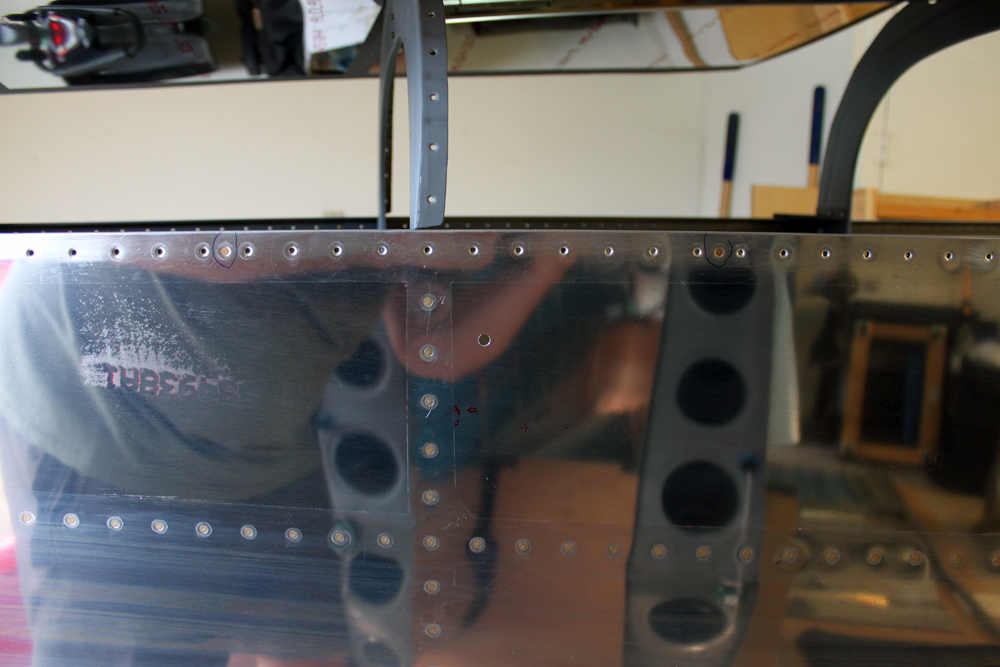
The first thing I did today was to drill the platenuts to the F-706 bulkhead. As usual, I used the actual platenuts as my templates for the rivet spacing. I used screws and washer stacks to attach the platenuts to the front of the F-706, then I match-drilled the rivet holes. When they finally get riveted on, the platenuts will be moved to the aft side of the bulkhead.

A few of the platenuts that had to be installed on the F-706 bulkhead. I clecoed them to the front of the bulkhead for drilling the rivet holes, but they’ll eventually be on the aft side.
At this point, there was no longer a reason to have the top skins on the fuselage. They are only limiting access, so I took them off and placed them in the middle of my wing cradle for storage. They shouldn’t need to go back on the fuselage until I’m ready to rivet them. With the top skins off, it was much easier to do all the dimpling that needed to be done on the F-706 platenuts. I also removed the aft baggage covers and floors to do the final prep work on those.
I decided today would be a good time to start painting some of the parts. The baggage bulkheads are both removable, so I thought I would start there. The upper baggage bulkhead was already finished, so all I had to do was scuff it with a Scotchbrite pad and clean it. Then, I gave it a coat of primer, let that flash dry, then gave it a coat of Rustoleum Hammered Silver. The Rustoleum paint is definitely easy to apply. No runs, and the hammered appearance likely covers up any of my smaller mistakes.

The upper baggage bulkhead after receiving a coat of primer (still wet).

The upper baggage bulkhead after being painted with some Rustoleum hammered silver. This stuff goes on easy!
In between paint steps, I started riveting the baggage platenuts to the F-706 bulkhead. For some reason, this was pretty slow going. I only managed to get through about half of the platenuts before calling it a day to go to a movie with my wife.
Baggage Bulkheads Started (1/12/13)
Posted by Ethan Jacoby in Aft Fuselage, Center Fuselage, Construction, Fuselage on January 12, 2013
4.8 Hours –
I was hoping that I would be able to get the static ports installed today, but FedEx didn’t show up with my order from Van’s in time. The order had a couple of small sealant kits in it, one of which was going to be used for installing the static ports. Instead, I only made it as far as drilling the holes for the ports in the side skins. Since I’m using the SafeAir static ports, I had to change the location slightly from that on the plans. My distance from the longeron rivet line remained the same at 2″ below the line, but I had to more the hole forward about a half-inch to accommodate the large flange on the SafeAir ports. Instead of 11/16ths forward of the bulkhead rivet line, I placed them at 1.25″ forward. Hopefully, this won’t introduce any error in my instruments that can’t be calibrated out. Once the locations were marked, I drilled and deburred 1/4″ holes. Installation of the ports will have to wait until I have the top skins off again.
Since I’m using the SafeAir static ports, I had to move the port location slightly forward to accommodate the flange of the port. The center of the hole is 2″ down from the longeron rivet line, and 1.25″ forward of the vertical rivet line.
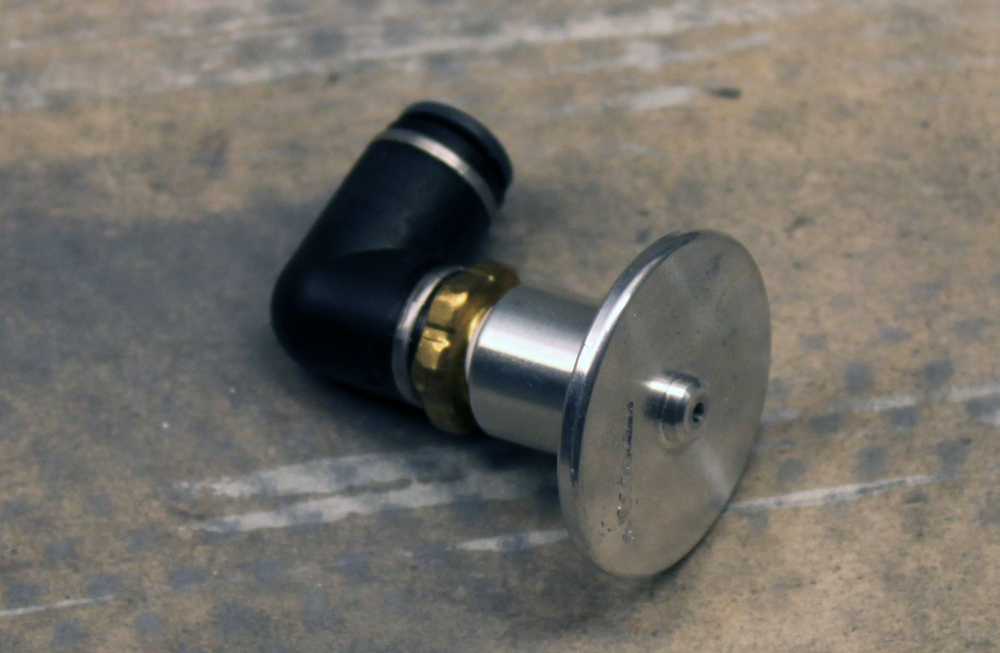
The SafeAir static ports with angled tubing adapter already attached. I wanted to install these today, but my pro-seal didn’t arrive from Van’s until after I had the top skins back on.
Since I wanted to keep working, rather than wait for my sealant, I clecoed the top skins back on. Right as I finished clecoing, FedEx showed up with the sealant. Since it took me about an hour to get the top skins back on, I decided to forge ahead, instead of taking the skins back off to install the static ports. On to the baggage bulkheads!
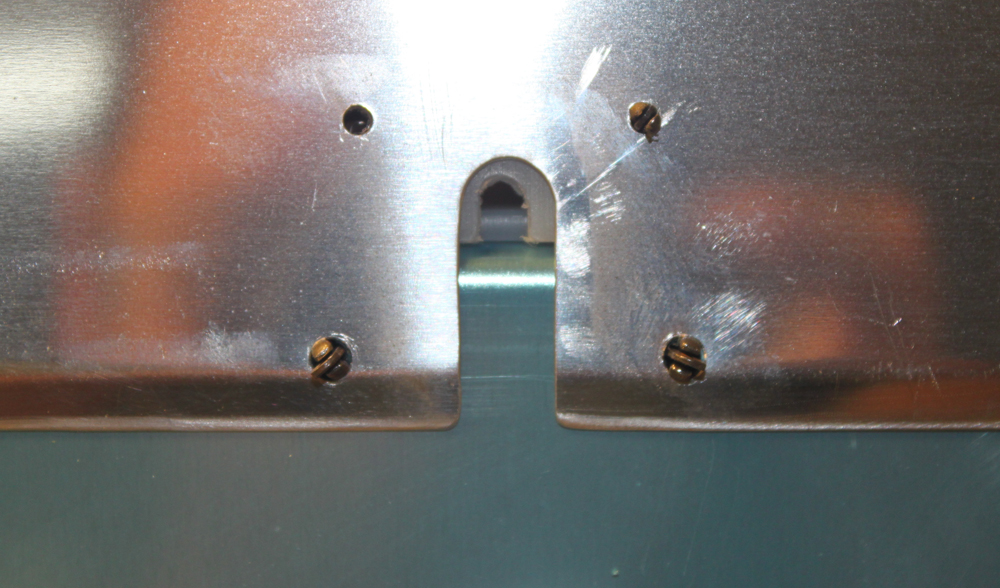
Before I could start working on the baggage bulkheads, I had to cleco in the aft baggage side covers and the baggage floors. With these in place, the baggage bulkhead could go in. The baggage bulkhead is split into upper and lower parts. The lower part has some pre-punched holes in it, and it can be clecoed to the corresponding holes on the lower section of the F-706 bulkhead. Once the lower part is clecoed, the sides can be match-drilled to the F-706 using the holes in the baggage bulkhead as guides. All of the holes are drilled for #8 screws. Eventually, the screws will be captured by nutplates installed on the aft side of the F-706 bulkhead.
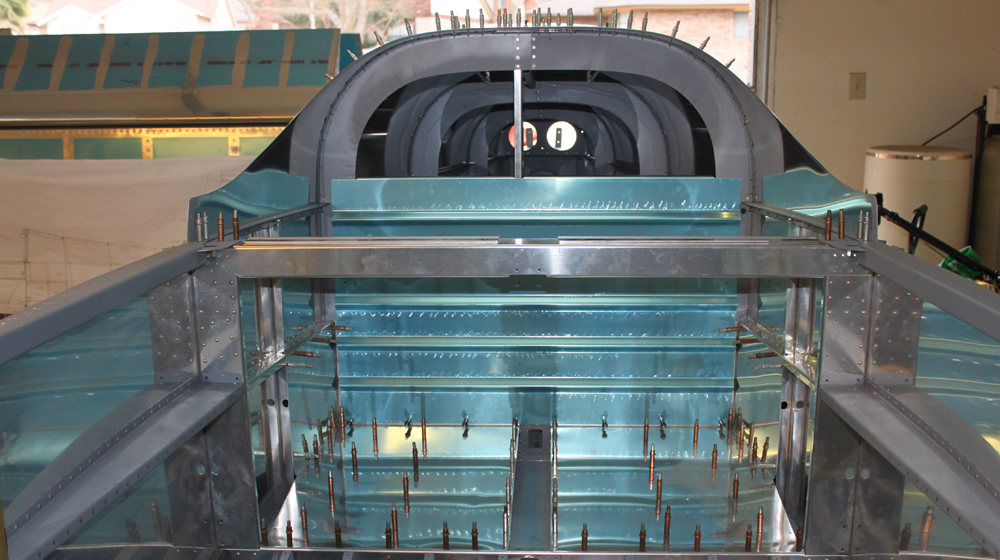
The lower baggage bulkhead is clecoed to the lower portion of the F-706 bulkhead, then the side are match-drilled.
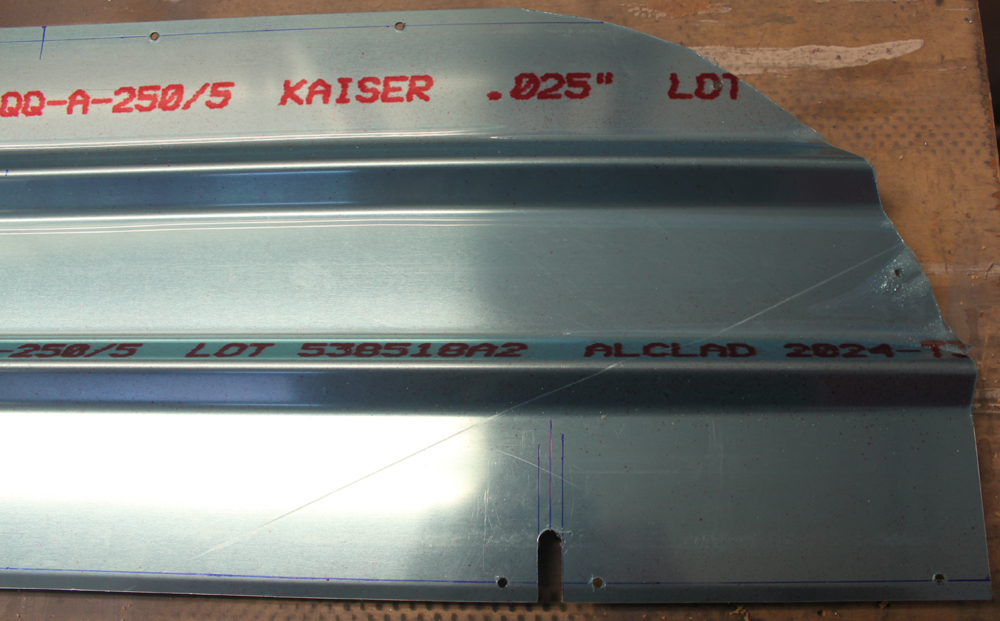
The top section of the baggage bulkhead is a bit more complicated. It comes as a rectangular pieces of corrugated aluminum sheet. The top of the sheet needs to have a couple of curves cut in it to match the curvature of the fuselage. Fortunately, the plans give very good details about the location and radii of the curves. The plans also give detailed measurements about where to drill additional holes for the screws that will attach the top section to the fuselage. Once everything was marked out, it was easy to cut the curves with my band saw. After cutting the top section, it was match-drilled to the F-706 bulkhead.

The upper baggage bulkhead has to have curves cut into the top. The plans are relatively clear about the location and radii of the curves. You probably can’t see my lines unless you click on the picture to zoom in.
The upper baggage bulkhead with the curves cut. This was easy to do with my band saw.
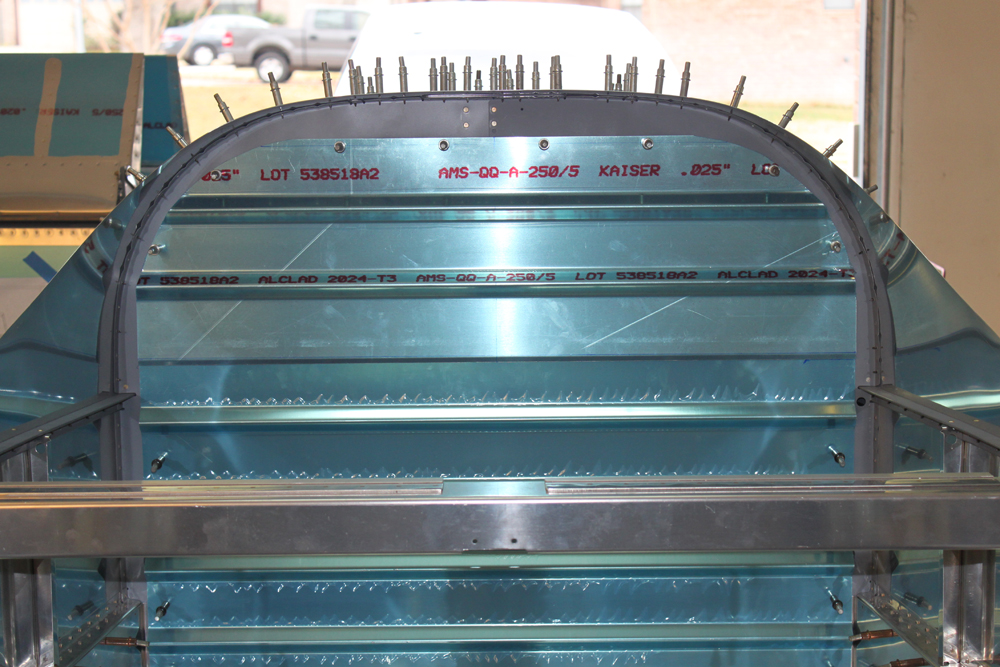
The upper baggage bulkhead is match-drilled to the F-706 bulkhead using hole location provided in the plans.
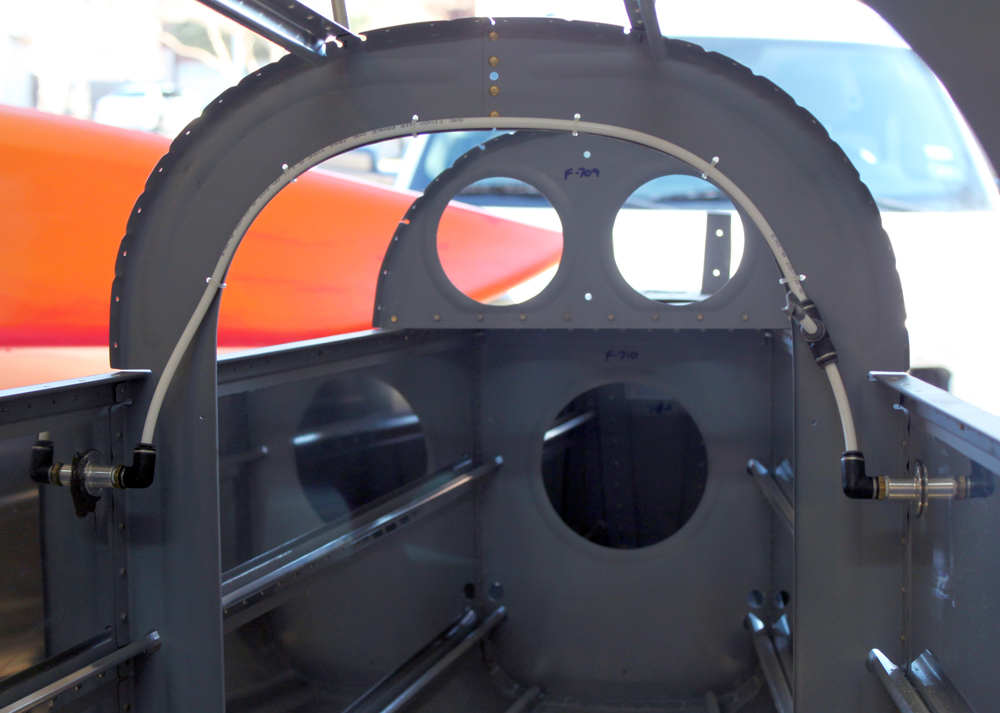
Next, I removed the top section of the bulkhead and cut two notches in it for the shoulder harness cable pass-throughs. Again, the plans had very clear locations for these, so they were simple to make.
Two notches have to be cut into the upper baggage bulkhead to act as pass-throughs for the cables that connect the shoulder harnesses to the airframe. Again, the plans had very clear details for the location of these notches.
Finally, I fabricated the wear blocks for the shoulder harness cable pass-throughs. These are just pieces of plastic that prevent the shoulder harness cables from rubbing on the aluminum bulkhead. The hardest part about making these was finding the stock material. Eventually, I discovered it in a small bag inside the bag containing the shoulder harness cables (a logical place that should have been my starting point). Of course, this bag was buried on the bottom shelf of my workbench under several other bags and coils of tubing.
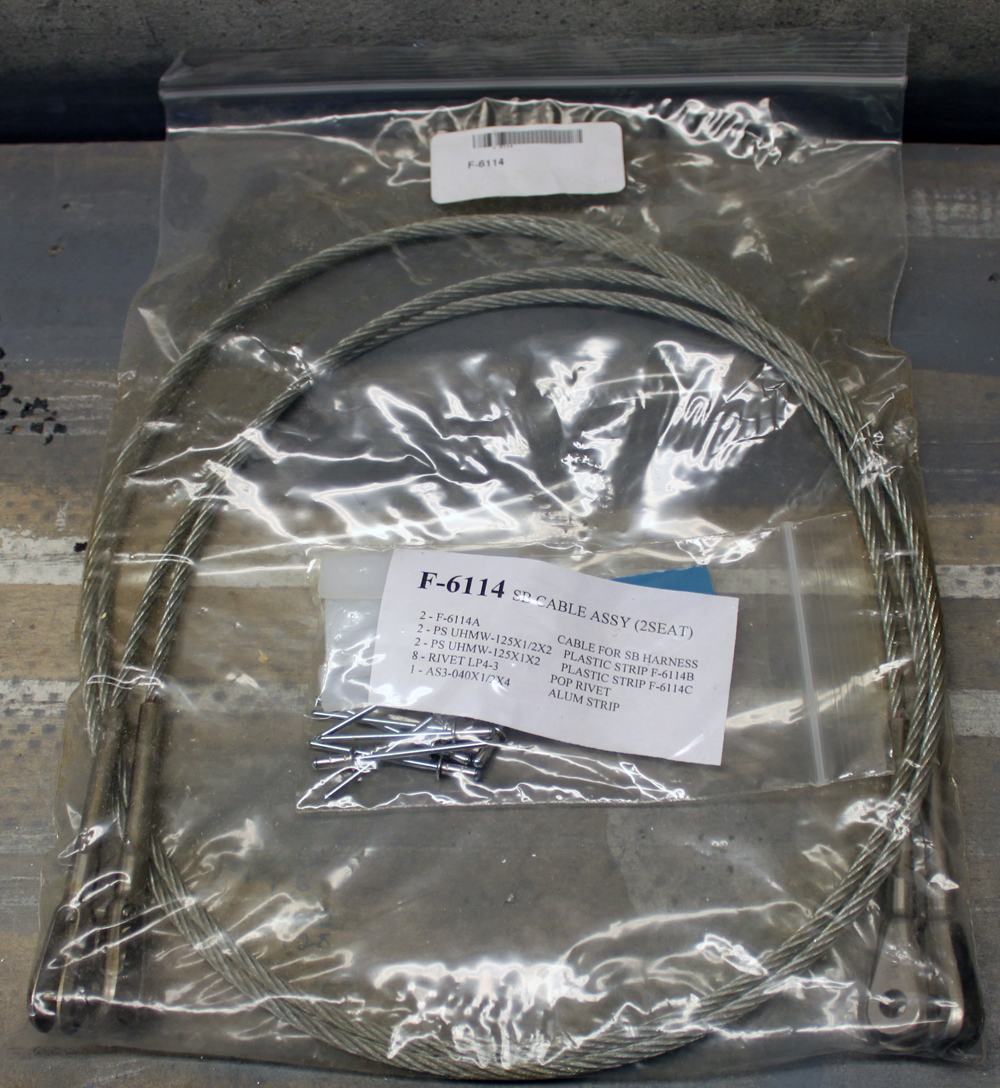
It took me awhile to find the parts for the wear blocks. They were in a small bag inside the seat belt cable bag, on the bottom shelf of my workbench, buried under a few other parts bags.
Once the parts were located, I made quick work of the fabrication. Several aluminum washers have to be made to give so that the rivets used to install the wear blocks will have better “grab” by having aluminum on both side instead of plastic. Rather than making aluminum washers, I’m going to use some aluminum rivet washers that I had purchased previously. Why do extra work when something you already have will work and look better! Two holes had to be drilled in each of the plastic blocks, and the larger blocks also had to have notches cut in them. Once all the parts were ready, I match-drilled them to the baggage bulkheads.
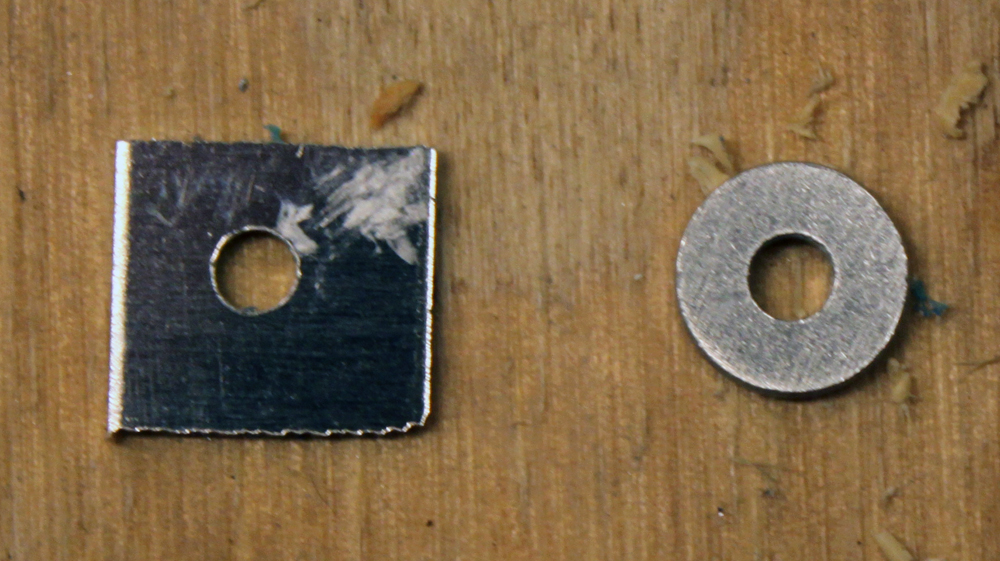
The wear block require 8 aluminum washers to be made from a strip of aluminum. I made them only to realize that I had some actual aluminum washers that would be perfect. It’s pretty obvious which one was made by me and which was made by a factory…I think I’ll use the factory-made washers!
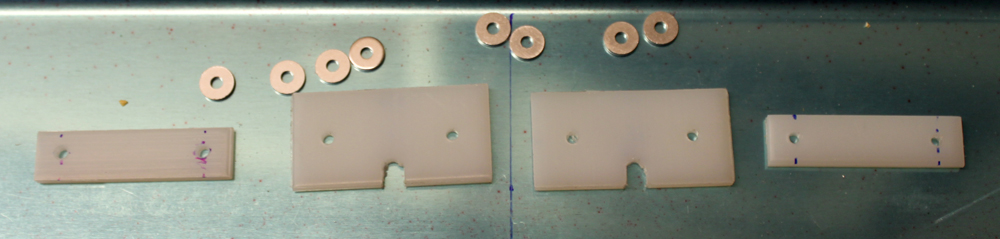
The completed wear block parts.
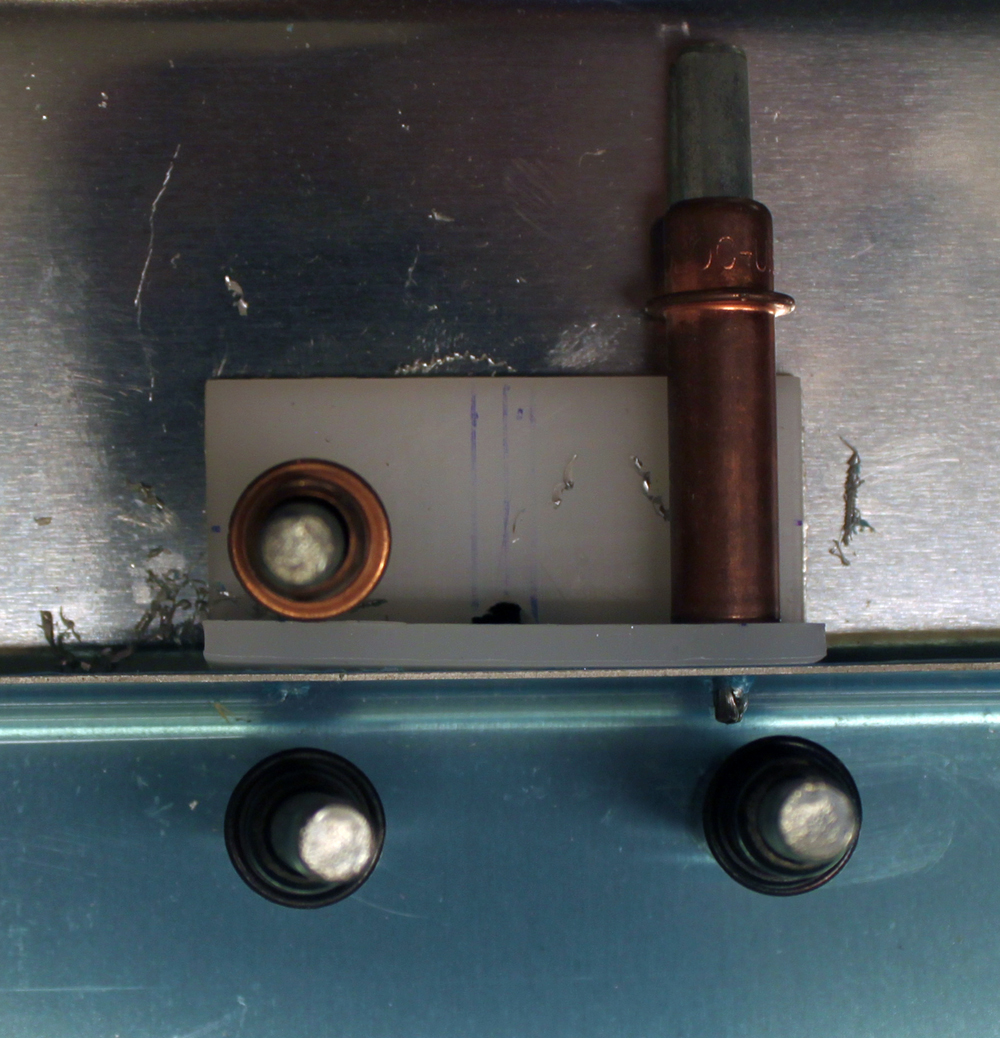
The wear blocks as seen from the aft side of the baggage bulkhead.
The wear blocks as seen from the font of the baggage bulkhead. At some point, these will be permanently installed with LP4-3 blind rivets.

Interesting Stuff


