Posts Tagged paint
Interior Painted (1/20/13)
Posted by Ethan Jacoby in Center Fuselage, Construction, Forward Fuselage, Fuselage on January 20, 2013
0.8 Hours –
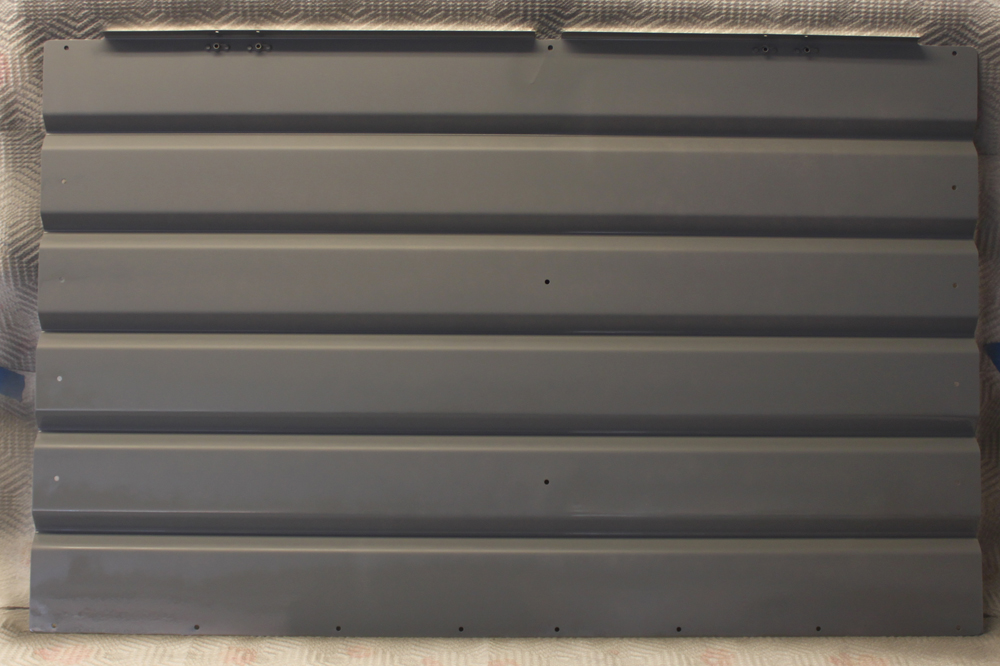
It was a pretty short day in the garage today. I picked up the interior pain in the morning, so, of course, I was anxious to use it. I had already scuffed and cleaned the areas that I wanted to paint, but I still went over them a second time with some acetone to make sure they were as clean as I could get them. I then masked off the outside of the fuselage to protect from over-spray. Once masked, pulled out the primer and sprayed away. Once the primer coat was on, I added the paint…Rustoleum hammered silver. I tried to paint only the areas that will be visible in the finished airplane. If an area is to be covered with a panel of some sort, I didn’t paint it. I also didn’t paint the forward most section of the fuselage between the forward-most vertical bulkhead and the firewall. I figured this area would be only slightly visible, and only if you were looking at the rudder pedals. I’ll give the paint a day to cure, and then I’ll try to be very cautious around the paint for at least another week as it continues to fully cure. From this point on, anything that gets added to the fuselage will get painted before it gets riveted.

The interior after paint. You can see that some areas are painted and some aren’t. The unpainted areas will get covered up by panels later.
Miscellaneous Tasks Again (1/19/13)
Posted by Ethan Jacoby in Aft Fuselage, Center Fuselage, Construction, Fuselage on January 19, 2013
3.0 Hours –
I worked on a few more miscellaneous things today. First, I finished prepping the lower baggage bulkhead, including primer and paint.
The lower baggage bulkhead primed and ready for paint.
Next, I installed some tubing that connects the two static ports together. There’s no real need to install this now, other than to close the system, preventing debris from getting into the ports. I placed a tee connection on the left side. Eventually, a tube will run from the tee to wherever my ADAHRS (air data and compass module) are located. However, for now, I just attached a short length of tubing and closed off the end with some duct tape to make sure nothing could get in.
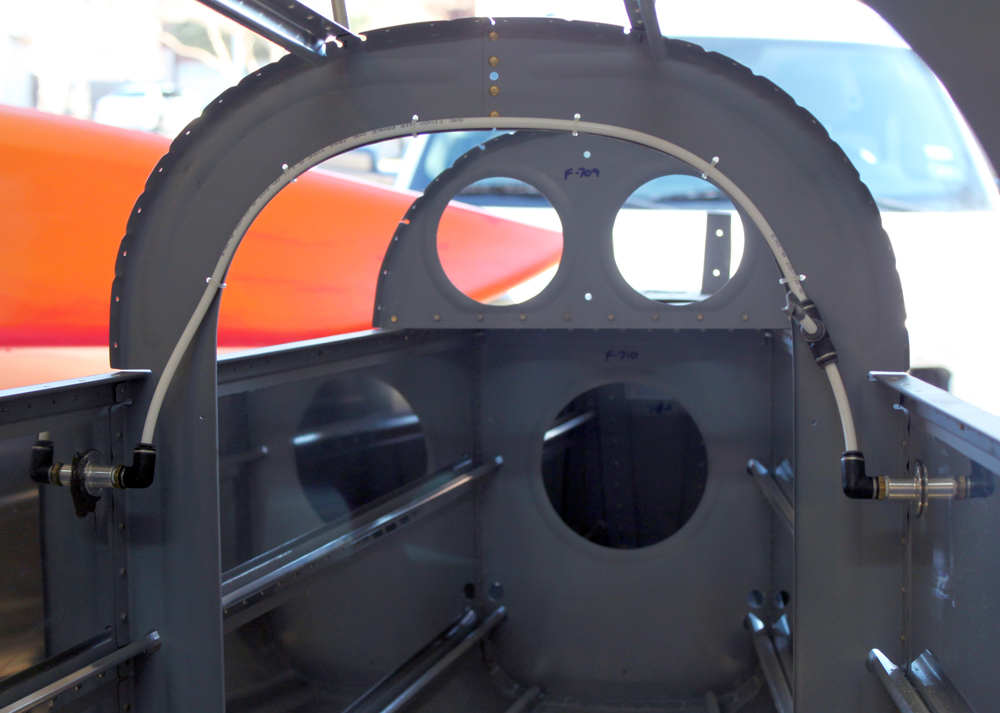
I installed the tubing that connects the static ports together. I did this now mainly to keep dirt, and other stuff, out of the system.
After taking a short break, I returned to the plane and prepped and painted the aft baggage covers. At this point, I think I want to paint anything going into the plane before it gets riveted. Along that line, I also decided to start getting the inside of the fuselage ready for paint. My plan is to paint everything from the F-706 bulkhead forward to where the sub-panel will be. That should cover everything that is visible. The floor forward of the F-704 won’t get painted though, as that will be covered with carpet. Similarly, I won’t paint anything that will later be covered by a floor board or access panel. Less paint equals less weight!
Interior Paint Test
Posted by Ethan Jacoby in Cabin, Construction, Fuselage, Random Stuff on September 27, 2012
Since I’m nearing the time when the fuselage will get riveted together, I’ve started thinking more and more about the planes interior. I definitely don’t want a full interior. Sure, they look nice, but they are expensive and add weight. With this in mind, my options are to leave the interior as bare aluminum, primed aluminum, or primed and painted.
I actually like the color of the NAPA 7220 self-etching primer, but I’ve noticed that it tends to absorb things like air tool oil. The stains can’t be wiped off with water. So, even if I did use just primer, I would likely need to seal it with some sort of top coat just to make sure it stays looking nice. If a top coat is needed, I figure I might as well paint.
For the color, I want something in the light gray to silver range. I’m not going to make a big investment in the appearance of the interior, so I’m sticking with rattle cans. Other than cost, an advantage of rattle cans is that I should be able to easily touch-up any areas that get damaged during the life of the plane.
When looking at colors, I decided that Rustoleum Hammered Silver is the closest to what I want. The hammered finish not only looks good to me, but it will also help hide some of my painting errors, dings in the metal, etc. The other advantage is that I can easily find this paint in the aviation aisles of Home Depot, Lowes, and Wal-Mart.
During an unrelated trip to Home Depot, I decided to pick up some paint for a test on aluminum. In addition to the hammered silver paint, I also picked up a can of Rustoleum self-etching primer. Once at home, I prepared a piece of test metal. I cut a 6 inch long by 2 inch wide piece of aluminum from some scrap, and then prepped it just like I would an actual part (deburred the edges, scuffed it with a Scotchbrite pad, and cleaned it). I then masked off the middle of the part, creating three test areas. Once side was sprayed with NAPA 7220 self-etching primer, the other side with the Rustoleum self-etching primer, and the middle was left as scuffed only with no primer.

I set up three zones on my test piece. From left to right: scuffed plus NAPA 7220 primer, scuffed bare metal, scuffed plus Rustoleum primer.
The NAPA primer dries much faster than the Rustoleum, but I gave them both about 45 minutes of drying time before applying paint. Having no practice with this particular paint, I started spraying. The coverage was good, and the hammered effect shows up immediately. On one side, the hammered effect is smaller and closer together, so I think I was spraying too close to the part. The other areas looked good.

Immediately after painting, the hammered finished is visible, but the appearance is different on the Rustoleum primed area.
After spraying with paint, I left the part to dry for an hour before checking it. After an hour, it was still a bit tacky. By three hours the paint felt dry to the touch. A big part of this test is durability, so I let the piece dry for approximately 24 hours and then did a scratch test across all three test areas. I then let the part dry/cure for a week and did another scratch test.

2.5 hours after painting, the paint is dry to touch.

At 24 hours after painting, I marked off the three different zones before doing a scratch test. The paint on all three areas looks good.
Results:
At about 24 hours post paint application, I attempted a scratch test. First, I just used my fingernail. Pressing relatively hard, I had no effect on the paint in any of the three zones. Next, I used a drill bit. The drill bit made fine scratches across all there zones, but no major damage could be seen. Finally, I used the clamping end of a cleco since it would have more contact area than the drill bit. With gentle pressure, the cleco had no effect, but, as I increased pressure, I was able to scrape off some paint. The area with the Rustoleum primer was the easiest to scrape, while the NAPA and bare areas performed equally well.

For the scratch test, I used the tip of a drill bit and the tip of a cleco. The cleco put in some deep scratches, but it wasn’t easy to do. The Rustoleum primed area was slightly easier to scratch.
I performed a second scratch test one week after applying the paint. As with the first test, the Rustoleum primed area was the easiest to scratch. However, it took significantly more force to make the scratches than it did during the 1 day test.

A second scratch test (upper scratches) was performed one week post paint. As before, the Rustoleum primed area was easier to scratch, but it took significant force.
With this is mind, it looks like the best choice is to stick with the NAPA 7220 primer. The Rustoleum primer performed adequately, since the force it took to make the scratches was more than the surface should see in the plane, but it clearly underperformed when compared to the NAPA.
The only decision that remains is whether to paint parts prior to riveting or to paint after assembly. Painting individual parts will make painting easier, but I don’t really like the look of painted parts with unpainted rivets. Most likely, I paint the inside of the fuselage once everything is together. At least removable parts, like seats, floors, etc, can be taken out and painted on their own.
Interesting Stuff


