Posts Tagged F-708 bulkhead
Aft Top Skin Riveting Finished (4/1/14)
Posted by Ethan Jacoby in Aft Fuselage, Construction, Fuselage on April 1, 2014
1.6 Hours –
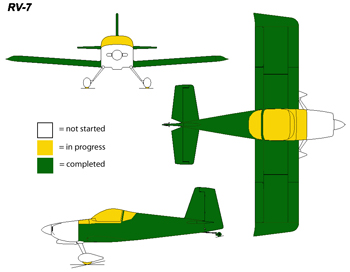
Today, I managed to find some time to spend on the plane, and picked up where I left off riveting the aft top skin. First, I riveted the skin to the F-708 bulkhead. A few of these were difficult to reach, but I managed to buck them without any issues. Then, I worked my way forward along the longerons to the F-707 bulkhead. No pictures today, but feel free to look at the pictures on my last post and just imagine fewer clecoes.
Aft Top Skin Riveting Started (3/29/14)
Posted by Ethan Jacoby in Aft Fuselage, Construction, Fuselage on March 29, 2014
1.8 Hours –
Even though I haven’t posted any progress for a few months (since November), I have been doing a few little things on the plane here and there. Just nothing worth writing a build log entry over. I definitely haven’t given up! Other excuses for not working on the plane more include lack of funds, cold weather, reduced free time, and busy with other things/hobbies. Today, however, I was a little on the bored side. I polished a big scratch out of the side of my truck (Turtle Wax Rubbing Compound is great!!!), but then I had nothing to do. The weather was pleasant, so I decided I needed to work on the plane.
After not doing anything major on the plane for a few months, the hard part is figuring out where to dive in. I decided to go head first and do some riveting. The top fuselage skins were still clecoed in place because I wanted to keep access to the aft fuselage easy. However, I knew I could still have plenty of access with the aft skin riveted, but I still want to keep the forward skin off for a while longer. So, I removed the forward skin, figured out the rivets needed for the aft skin, and started pounding.
I started by riveting the J-channels to the top of the aft skin. To access these, I just unclecoed the sides of the skin from the lower fuselage. Once the J-channels were riveted, I re-clecoed the sides of the skin and riveted the skin to the F-709 bulkhead. Finally, I worked my way forward along the longerons until I reached the F-708 bulkhead. Fortunately, my arms are long, and I could easily reach all of the rivets by reaching through the lightening holes on the F-709 bulkhead.
Once I reached the F-709 bulkhead, my hands and arms were getting tired, so I decided to call it a day before I started making mistakes. Having not riveted for months, I think I did pretty good. One very minor ding (that will get covered by the tail fairing), and no drill-outs. If my motivation stays strong, I’ll finish riveting the aft skin tomorrow.
Aft Fuselage Initial Assembly Started (2/9/12)
Posted by Ethan Jacoby in Aft Fuselage, Construction, Fuselage on February 9, 2012
2.0 Hours –
My plan was to just do a couple quick things in the garage, but that quickly turned into two hours or work. On the plus side, it’s starting to look like I have an airplane in my garage, a disassembled airplane, but an airplane none the less.
The first thing I did was to steal an idea from several other builders and make a cheap center-line marker for marking the J-channels. A couple of the tool vendors sell nice versions of this, but I don’t think I will use it enough to justify the cost. Instead, I just taped a popsicle stick and a piece of aluminum to a sharpie. The popsicle stick is pressed against the edge of the piece being marked, resulting in a nice center-line all the way down the long lengths of J-channel. Marking all 6 pieces of J-channel took a matter of minutes with this setup.

A popsicle stick, a piece of aluminum, and some tape is all it takes to make a cheap centerline marker.

The center lines aren't perfect, but they're good enough for positioning and drilling the J-channels.
Next, I grabbed the F-779/F-711/F-712/WD-409 assembly. I still wasn’t perfectly happy with the fit of skin and the cutout for the WD-409, so I took the assembly apart and widened the cutout a bit more. I also used my hand seamers to bend the skin a bit more (not much). Finally, I enlarged a rivet hole in the skin so that it would accept a socket. Once the plane is assembled, this hole will allow me to get a socket on the nut that holds the tail spring in the WD-409. I then reassembled the parts and was much happier with the overall fit.
As I read the next step in the plans, I was happy to find out that I would finally get to start putting some of my assemblies together. Unfortunately, I would need three of the larger skins, and they were all located at the bottom of my parts crate. So, I started moving parts from the crate to the bench or floor until I reached the big skins on the bottom. I pulled out the F-778 aft bottom skin and placed it across a couple sawhorses. I also pulled out the F-773 side skins and leaned them against the sawhorses. I then took a few more minutes to move all the parts back into the crate.
With the F-778 aft bottom skin sitting on the sawhorses, I clecoed the F-707 and F-708 bulkheads to the skin. Then, the bottom four pieces of J-channel were slid into place. After that, the F-773 side skins were clecoed to the bulkheads. Finally, I positioned the F-706 bulkhead so that I could see how the forward ends of the four lower J-channels needed to be trimmed. I then marked the J-channels for trimming and removed them from the structure.
At this point, I called it a night. Next, I’ll trim the J-channels, replace them in the structure, and cleco the F-706 bulkhead in place. I have to admit, seeing big structures come together is always fun!
F-706 Bulkhead Work (1/15/12)
Posted by Ethan Jacoby in Bulkheads, Construction, Fuselage on January 15, 2012
3.0 Hours –
I still feel like I’m doing a lot of work on these bulkheads with little to show for it! Oh well, back at it today.
The first thing I did was to rivet together the, now primed, halves of the F-707 and F-708 bulkheads. One bulkhead had 6 rivets that could be set now and the other had 8. All of these rivets could be squeezed, so they took no time to install. At least I now have a couple finished bulkheads to show for all my work!
I couldn’t delay the F-706 bulkhead any longer. This is the bulkhead with the really crappy looking parts. Specifically, the sides and bottom are a mess…very warped and ugly aluminum. After deburring the edges of the parts, I attacked them with my fluting pliers in an attempt to get them straight. This was a lot of work and they still aren’t as straight as I would like them to be. However the metal is so thin and flexible that I don’t think it will be a problem if I have to slightly “pull” them into place with clecoes through the skin when the time comes.
Next, there are three angles pieces that have to be fabricated out of .063 x 3/4 x 3/4 stock. The F-728B and F-729B angles are easy as they just have to be cut to the proper length. However, the F-729C angle takes a bit more work. For this part, the stock is cut to length, and then the plans state to close the angle very slightly to 88.5 degrees. To do this, I just clamped the angle in my vise and continued to close the vise jaws until the angle was closed very slightly. Easy enough.

The plans say to make the angle 88.5 degrees instead of 90...not much of a bend, but it was easy to squeeze closed in my vise.
With all the angles made, I went ahead and match-drilled the two longer angles to the bellcrank support structure. The F-728B angle was drilled to the F-728A bellcrank channel, and the F-729B angle was drilled to the F-729A bellcrank rib.

The longer lengths of angle have to be match-drilled to the F-728A bellcrank channel and the F-729A bellcrank rib.
Finally, I clecoed the F-706 structure together for the first time. With the structure assembled, I could check the bend on my F-729C angle. It fit perfectly, so no more bending was needed. Next up, the structure will need to be final drilled, but that’s not going to happen today.
F-706, F-707, F-708 Bulkheads Continued (1/14/12)
Posted by Ethan Jacoby in Bulkheads, Construction, Fuselage on January 14, 2012
1.8 Hours –
I’m back to work on the plane after taking about a week off from the project. The main reason for the break is that I got married last weekend. We had a small beach ceremony in South Padre Island, TX. The weather was perfect and it was nice to see some family members that we had not seen in a while. Now, I’ve got to get this plane built so that we can cut down the travel time to South Padre. Six hour drives are no fun, but two-hour flights are!
Back in the garage, it took me a little time to remember what was left to be done on the bulkheads. I had received my #10 drill from Aircraft Spruce, so I decided to finish up the F-661EF flap bearing blocks first. After enlarging the first hole in the blocks to #10, I mounted the blocks on the F-705 bulkhead assembly with one bolt and a clamp.

After drilling one hole in the flap bearing block, I used a bolt and a clamp to position it for drilling the second hole.
Since I had marked a center line on the blocks, it was easy to make sure the blocks were straight. Once aligned, I used my air drill to start the hole for the second bolt. However, I only drilled this hole about 1/4″. Then, with the hole “marked”, I moved the block to the drill press to finish the hole since I didn’t think I could make a straight hole by hand through the two-inch thick blocks.

I only drilled the second hole about 1/4" while the block was clamped to the bulkhead...it will get finished on the drill press.
Once the second hole was drilled in the blocks, I temporarily installed the blocks on the bulkhead using the appropriate bolts, washers, and nuts. However, I only loosely installed the nuts for now since the blocks will be removed to rivet the skins.

The finished product. Only loosely installed for now since they will have to come off to rivet the skins.
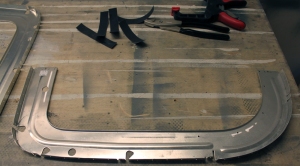
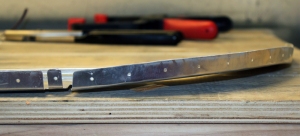
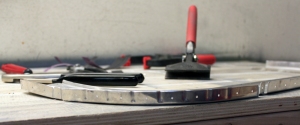
With the flap blocks out-of-the-way, I moved on to the F-706, 707, and 708 bulkheads once again. As I stated in a previous post, these parts are just plain ugly and they need a lot of finishing work. For today, I finished deburring and fluting the F-707 and F-708 components. However, I decided to wait on the F-706 bulkhead parts as they will require the most work. Since these parts are all such a mess, I’m going to prime them. In this case, the primer is mainly for appearance, not corrosion protection. I managed to clean, scuff and prime the F-707 and 708 parts today, so at least I’ll be able to rivet those together and set them aside tomorrow.
F-706, F-707, and F-708 Bulkheads Started (1/5/12)
Posted by Ethan Jacoby in Bulkheads, Construction, Fuselage on January 5, 2012
3.0 Hours –
I couldn’t resist drilling the F-661EF flap actuator bearing blocks even though I don’t have the correct drill size yet. The closest drill I had to a #10 was a #12, so I chucked it into the drill press, clamped the block into place and drilled. The plastic was, of course, easy to drill, and I was actually surprised when I test fit a bolt and found that you really do have to go up in drill size when working with plastic. So, I’ll have to enlarge the hole once I get the #10 bit, but that’s easy. I’ll also wait until I have the other bit before drilling the second hole.
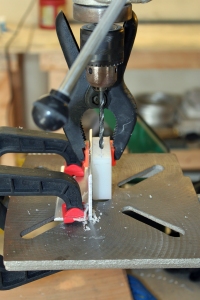
I started drilling the flap bearing blocks even though I don't have the right size bit. Clamped to the drill press with a piece of angle, the hole came out nice and straight.
Next, it was time to move on to some other bulkheads, so I had to spend some time rearranging the plans. I have so many large plans sheets now that rearranging them can take some time. It didn’t help that the drawings for the F-706, -707, and -708 bulkheads are split between two sheets.
After organizing the plans, I had figured out what parts I needed and set out on a search through the parts crate. After a bit of searching, I found everything I needed and got to work. The first thing I did was to locate and enlarge all the snap bushing holes for the rudder cables, wiring, and static system. Once these were all drilled, I started doing the finishing work on the bulkhead parts. These parts are in pretty rough shape out of the box. They are made from thin aluminum and they are severely warped in areas due to the way they are formed at the factory. Because of this, the bulkheads are going to take a lot of fluting to get them straight again. For today, I only finished the F-708 bulkhead components.


